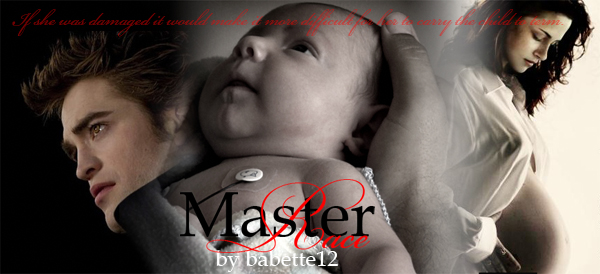
So,I love when authors post a banner with their story. It's like advertisement or window dressing for a story. Plus I'll take any excuse to look at Robert's beautiful face...drool.
Now is a great time for my disclaimer, I am not a graphic designer and far from a photoshop pro. I simply love Twilight and like fussing around with Photoshop. Whew, glad that's out of the way, now let's get down to the first tutorial.
The first type of banner that I am going to feature I like to call the Easy Style Banner. We will basically be taking an image and then add the story tile, author's name and we are done. Easy, right?
Step 1: The first thing that I did was search for an appropriate Kstew and Rpatz picture. Not a difficult task seeing as there are a million out there. Just go to Google and search for Robert Pattinson and Kristin Stewart pics.
Note: If you want to make this really easy try looking for an image that is landscape, then you don't have to crop it.
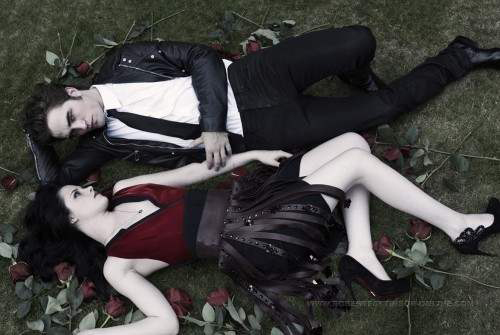
Here is the picture I'm going to use:
 Step 2:
 Go to Photoshop and open your image (ctrl + O).
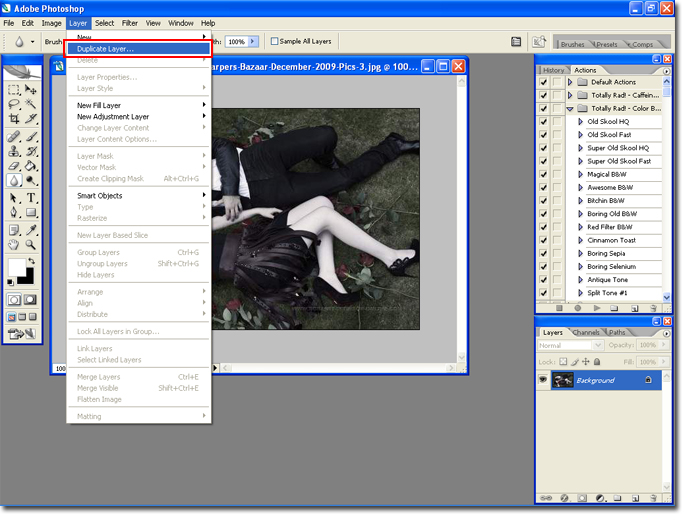
Step 3: Duplicate the background layer (ctrl + J or Layer Duplicate Layer).
 Step 4:
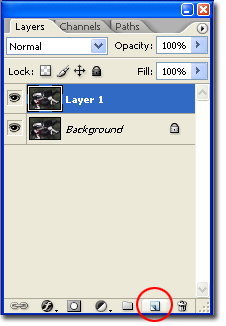
 Create a new layer (shift + ctrl + N or click on the new layer icon).
 Step 5:
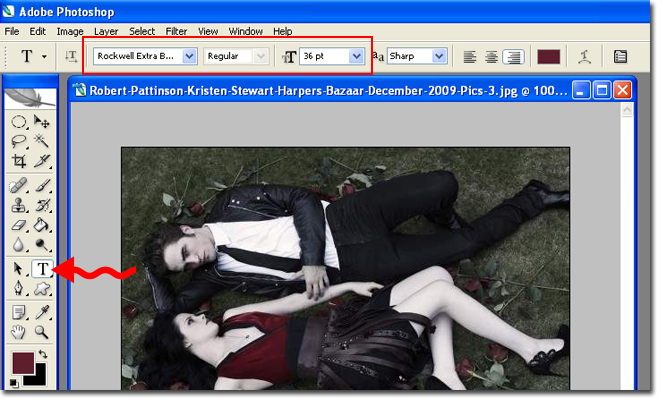
 Set the color for your text by changing the forground color. Select the
Horozontal Type Tool and set your font settings.
 Optional:
 I really liked the color of Bella's top and wanted the font color to match. I used the Eye Dropper Tool. Just hit
I on your keyboard to select the Eye-Dropper tool. Then click once on the color you want.
Step 6: Type in the title of the fan fic and then use the
Move Tool to move the title to where it looks best.
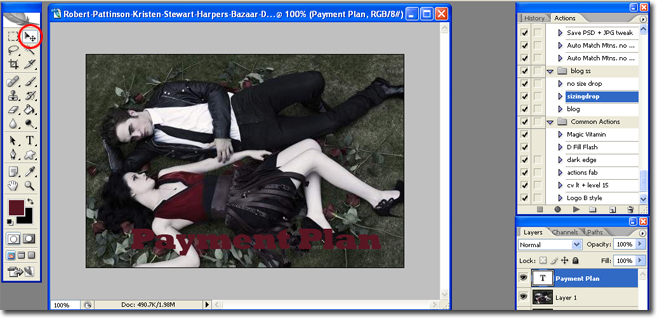
Follow steps 4 - 6 again, this time entering the author of the fic rather than the title.

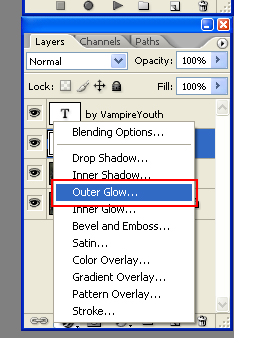
I feel like my title needs a little something else, so I am going to add an outerglow. This will make my title stand out a bit more.
Step 7: In the layers pallet, select the layer that has your title. Click on the
Layer Style icon, this is the icon that looks like the italic F. Select
Outter Glow.
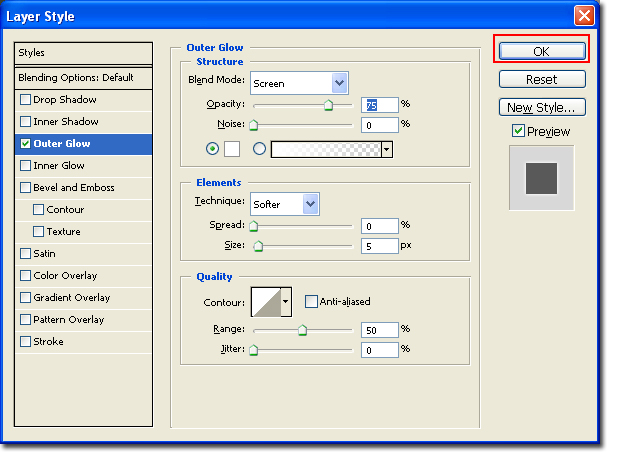
 Step 8:
 Play around until you are happy with the results. Here are the settings I used.
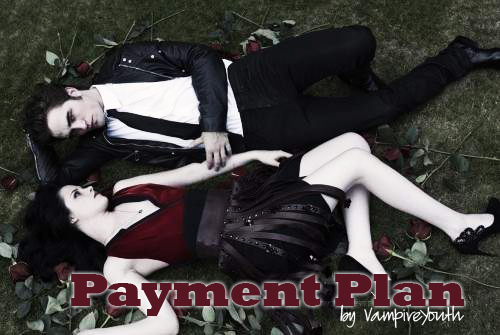
Here is my final product:
Upload your image to photo hosting website and enjoy.
Here are some of the forthcoming tutorials. If you have a tutorial that you would like to see
please feel free to
email me
1. Blending Images
2. Cutting Out Images
3. Fonts, Fonts, Fonts
4. Linking Text
5. HTML Basics
6. How To Create Blinkies
-- VampireYouth